Coral is an open-source commenting platform designed for publishers and online communities to enable and manage audience discussions. It offers tools for moderation, spam filtering, and user engagement, helping to maintain constructive and respectful conversations on websites. Ideal for media sites.
To get started with Coral and bring its powerful commenting features to your site, let’s walk through the steps to set it up locally using Docker. We’ll be following the official installation guide to ensure a smooth setup process, adapting it for a local environment using Docker.
Step 1: Install Docker and Docker Compose:
Docker is a platform that allows developers to package applications and their dependencies into isolated containers, ensuring consistent performance across different environments.
Docker Compose is a tool for defining and running multi-container Docker applications. With a single YAML configuration file, it simplifies the setup and management of complex applications by coordinating multiple containers (e.g., app, database, cache) in one command.
For our local setup, we’ll use Docker Desktop, which includes Docker Compose built-in, making it easy to manage all necessary containers for Coral in one application.
Step 2: Set Up Data Directories
Create a main folder for the installation and subdirectories to store MongoDB and Redis data. This will ensure data persistence across container restarts. Run the following commands:
mkdir coral-installation
cd coral-installation
mkdir -p data/{mongo,redis}
Step 3: Generate a Signing Secret
This step creates a unique signing secret used by Coral to securely sign and verify tokens for user authentication and session management. It’s essential for protecting user data and ensuring the integrity of your application’s sessions. You can generate this secret with the following command:
export SIGNING_SECRET="$(openssl rand -base64 48)"Using export here makes SIGNING_SECRET available as an environment variable in your current terminal session. This way, when we run Docker Compose in the next steps, the SIGNING_SECRET variable will be automatically passed to the Coral container, ensuring secure communication without hardcoding the secret in any files.
Step 4: Create a docker-compose.yml File
To configure Coral and its dependencies (MongoDB and Redis), we’ll create a docker-compose.yml file. This file defines all necessary services and their configurations. Follow these steps to create it directly in the terminal:
- Open a new file called
docker-compose.ymlusing a text editor likenano:
nano docker-compose.yml- Paste the following content into the file:
services:
  talk:
    platform: linux/amd64
    image: coralproject/talk:9.5.2
    restart: always
    ports:
      - "127.0.0.1:5000:5000"
    depends_on:
      - mongo
      - redis
    environment:
      - MONGODB_URI=mongodb://mongo:27017/coral
      - REDIS_URI=redis://redis:6379
      - SIGNING_SECRET=${SIGNING_SECRET}
  mongo:
    image: mongo:4.2
    volumes:
      - ./data/mongo:/data/db
  redis:
    image: redis:3.2
    volumes:
      - ./data/redis:/data
Adding platform: linux/amd64 to docker-compose.yml file ensures that your Docker containers run using the Linux architecture, specifically amd64. This is especially useful if you’re using a machine with an ARM-based processor, like the Apple M1 or M2 chips, as Docker may otherwise attempt to run containers in ARM architecture, which could lead to compatibility issues if the container images are not built for ARM.
- Save and close the file. In
nano, you can do this by pressingCTRL + X(Control + Xon MacOS), thenYto confirm changes, andEnterto save.
This docker-compose.yml file defines each service Coral needs to run, along with the environment variables and data directories.
Step 5: Start Coral Using Docker Compose
Now that we have configured Coral and its dependencies, we can start the application with Docker Compose. This command will read the docker-compose.yml file and set up each service as specified.
- Start the services using Docker Compose:
docker-compose up -dThe -d flag runs the containers in detached mode, meaning they will run in the background, allowing you to continue using the terminal.
- Check that the containers are running by listing all active Docker containers:
docker psAt this point, Coral should be running on your local machine.
Step 6: Access Coral
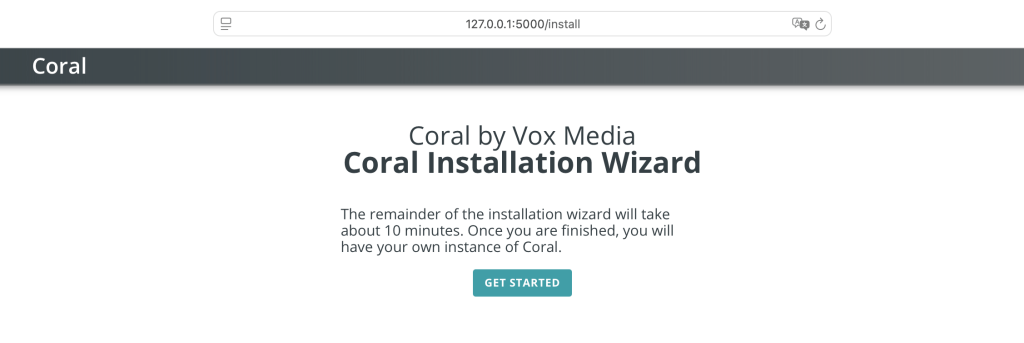
With Coral now running in Docker, it’s time to access the application through your browser to complete the initial setup.
- Open your browser and navigate
http://127.0.0.1:5000This URL points to the Coral web interface running on your local machine. - Set Up an Admin Account:
When you access Coral for the first time, you’ll be prompted to create an admin account. This account will allow you to manage settings, moderate comments, and configure Coral according to your needs. - Configure Basic Settings:
- After creating an admin account, Coral’s setup wizard will guide you through some initial configurations, including language preferences, community guidelines, and moderation settings.
- You can later adjust these settings as needed from the Coral admin dashboard.
Congratulations! You now have Coral installed and running locally, ready for customization and testing.

Conclusion
In conclusion, you can now easily manage your Coral installation using Docker Desktop. From there, you can start, stop, or restart containers for Coral, MongoDB, and Redis as needed. Docker Desktop provides a user-friendly interface to monitor resource usage, view logs, and control each container without needing to use command-line tools, making it simple to maintain and troubleshoot your setup.


Leave a Reply
You must be logged in to post a comment.